ShopDreamUp AI ArtDreamUp

Deviation Actions


Description
For the past few days, I've been working on a watercolor painting and started to photograph all the steps. When I set out to do the watercolor, this is how it happens! This particular painting was done on toned rag paper with watercolor and gouache.
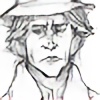
1) With a 4H and 2H pencil, sketch in a rough idea of what you want to paint. Resist the urge to get hooked up on too much detail, and try to sketch in an idea of where your darkest regions are going to be. Using the light H pencils is important because they have hard lead that's not going to sink into your watercolors and turn them gray later.
2) Pick out your palette! I always love this part. At the onset of a painting like this, I use transparent watercolors only. I mix up a large quantity of the four or so colors that will dominate the painting. In this case it was a funky red, purple-black, light cyan-ish green, and a steely gray. Then I start to lay in an idea of a background with these colors. The goal was something energetic, evoking a battleground covered in clouds of smoke.
3) Mix up a new color that's going to jump out from the others. I went for a bright rusty brown and began to lay it in on his jacket for a warm tone that'll pop out. As it's counterpart, I put in a cool bluish tone that would recede and set up a sense of depth.
4) Play with the colors you've already mixed to set up midtones, shadows, and highlights. I knew the red would be my highlight and backlighting color, so I used it only where light would touch the figure. Then, with a fine liner brush and a hyper-saturated purple-black, I drew in the details of the face, hands, and wrinkles because they could be easily lost under the layers of paint to come.
5) Continue to tackle those shadows, midtones, and highlights with just your transparent watercolors. Try not to mix outside the palette you've already established - it'll keep everything united in the end. It's at this point that I started worrying about his armor and made sure to really preserve the highlights and shadows that make it appear metallic.
6) I don't generally wait this long to color the face, but with all the other browns and reds going on here, I wanted to make sure the color I mixed for his fleshtone didn't blend too much with any of the colors in his clothes. This was also a good time to add in a splash of color to his costume with that blue symbol on his belt and the autumn orange on his neckband and sword.
7) Details! It is at this point that you can indulge your ocd tendencies and detail the hell out of everything! Hoorah! Grab your gouache for this step. Because it's opaque, you can lay it over the foundation you've already made with your transparent watercolors. You can really see this at work in the face, where I mixed up a range of pink and olive colors in gouache and used them to bring the nose, chin, and cheeks forward. Opaque white hatchmarks also give his sword and armor the impression of light glinting from scratches and nicks.
Well, that about does it. Does anyone else have their own techniques with gouache and watercolor they want to share? Any tutorials of your own?
Image size
972x9118px 1.64 MB
Make
SONY
Model
DSC-W230
Shutter Speed
1/30 second
Aperture
F/2.8
Focal Length
5 mm
ISO Speed
200
Date Taken
Jan 21, 2013, 9:55:33 PM
© 2013 - 2024 Tin-Lizzy
Comments1
Join the community to add your comment. Already a deviant? Log In
IT'S LIKE MAGIC